What it is for#
This is where you send a one-off push message: you pick people in the table, write a title and a message, and it goes out at that moment. Use it for what cannot wait until someone opens the app, such as a last-minute change.
The table only lists people who can receive messages, that is, people who have the app with notifications allowed.
Where it is: Manage › Notifications › Send Push Notifications.
What you see#
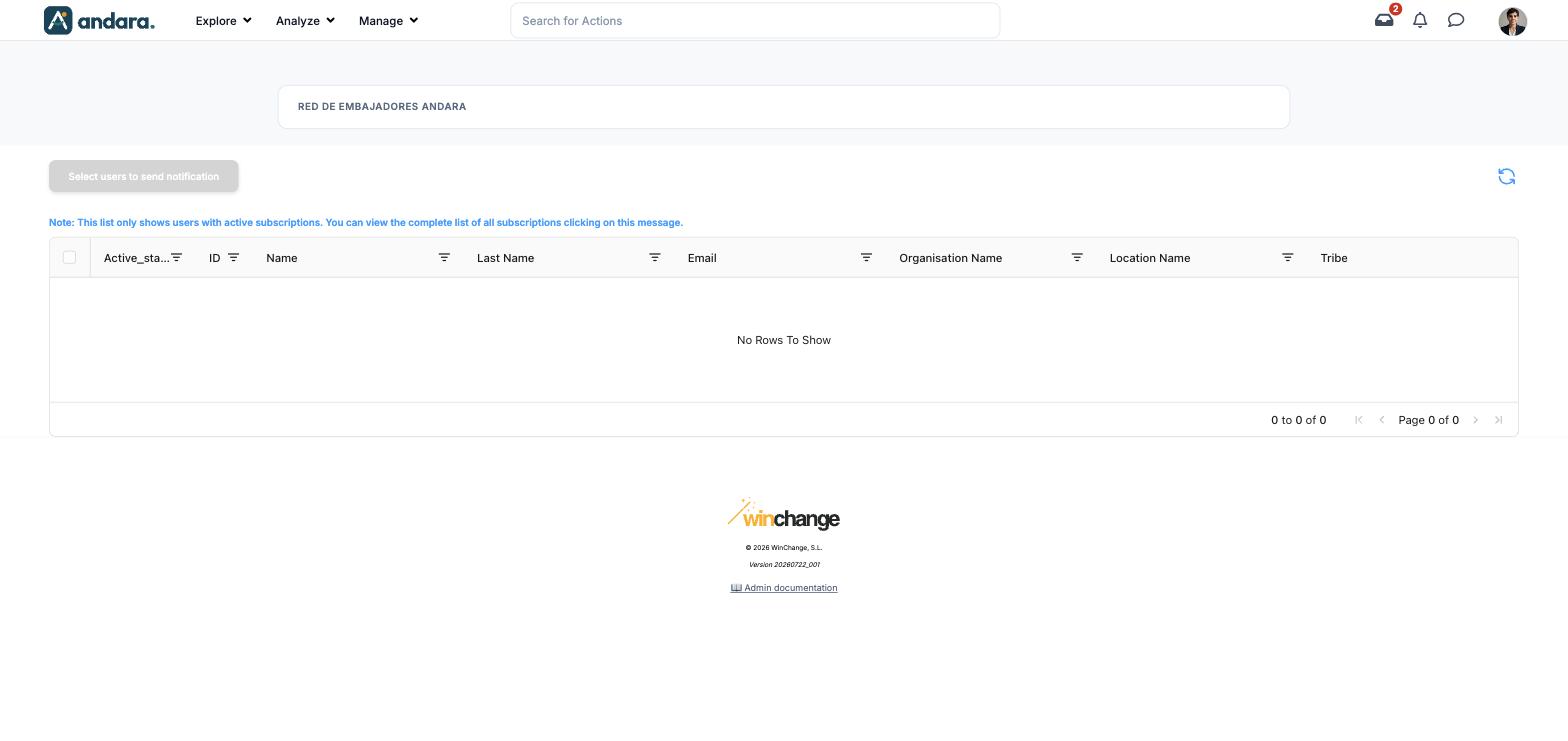
The name of the project you are in appears at the top.
| Element | What it shows |
|---|---|
| Select users to send notification | Opens the sending form. It is disabled while nobody is selected. |
| Refresh icon | Top right: reloads the list. |
| Note: This list only shows users with active subscriptions… | Clicking it takes you to the full list of subscriptions. |
| Tick box | Selects the person. The tick box in the header selects every row. |
| Active_status | Whether the person is active in the app. |
| ID | Their internal number. |
| Name / Last Name | First and last name. |
| Their email. | |
| Organisation Name | Their unit in the structure. |
| Location Name | Their location. |
| Tribe | Their tribe. |
| Column filter | The icon next to each heading filters by that column, for example to keep one location. |
In the demo the table is empty (No Rows To Show): nobody has the app with notifications allowed, so the send button cannot be used.
Settings#
Send notification#
The form opens from Select users to send notification. There is no screenshot because the demo has nobody to select.
| Field | What it does | Values |
|---|---|---|
| Title | The headline of the message, the first thing read on the phone screen. | Text. |
| Message | The body of the message. | Long text. |
| Send | Sends the message to everyone selected, straight away. | Button. |
The form closes with the × in its header without sending anything.
How to#
Send a message to a group#
- 1
Filter the list
Use the Location Name, Organisation Name or Tribe filter to keep the group.
- 2
Select
Tick people one by one, or use the header tick box to select everyone left.
- 3
Write
Press Select users to send notification and fill in Title and Message.
- 4
Send
Check the text and press Send. It goes out immediately.
Things to know#
A sent message cannot be withdrawn or corrected. There is no draft and no preview: check the Title and Message before pressing Send.
- Filtering by location or tribe does not give you the whole location, only the part that has the app with notifications. For something that must reach everyone, this channel is not enough.
- Messages go out immediately: they cannot be scheduled.
- These messages do not appear in the smart notification log.
- Active_status is shown with its technical name.
Related#
- Notifications and email: when to use each channel.
- Push Subscriptions: why someone is not on the list.
- Push Notification Settings: the messages that are sent automatically.