What it is for#
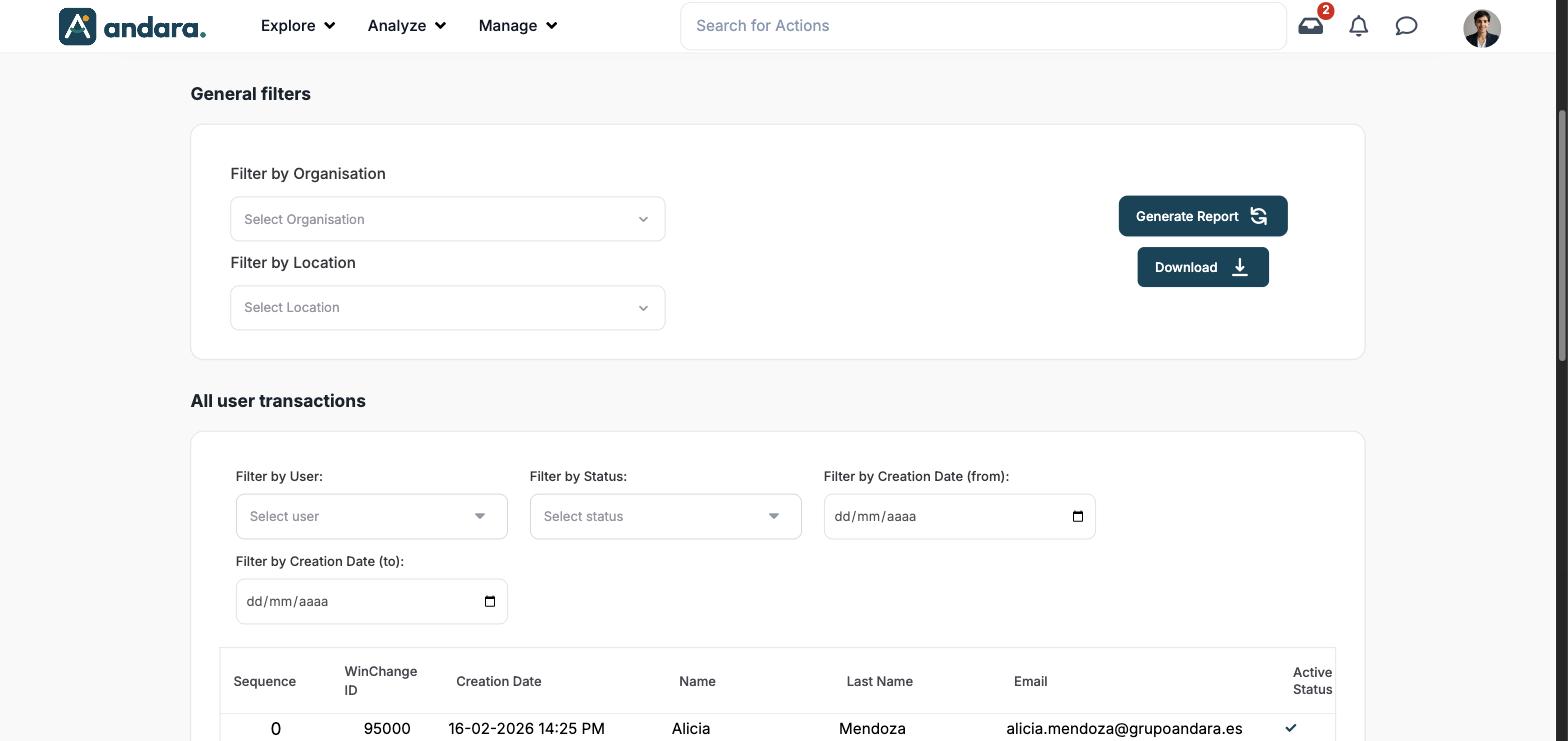
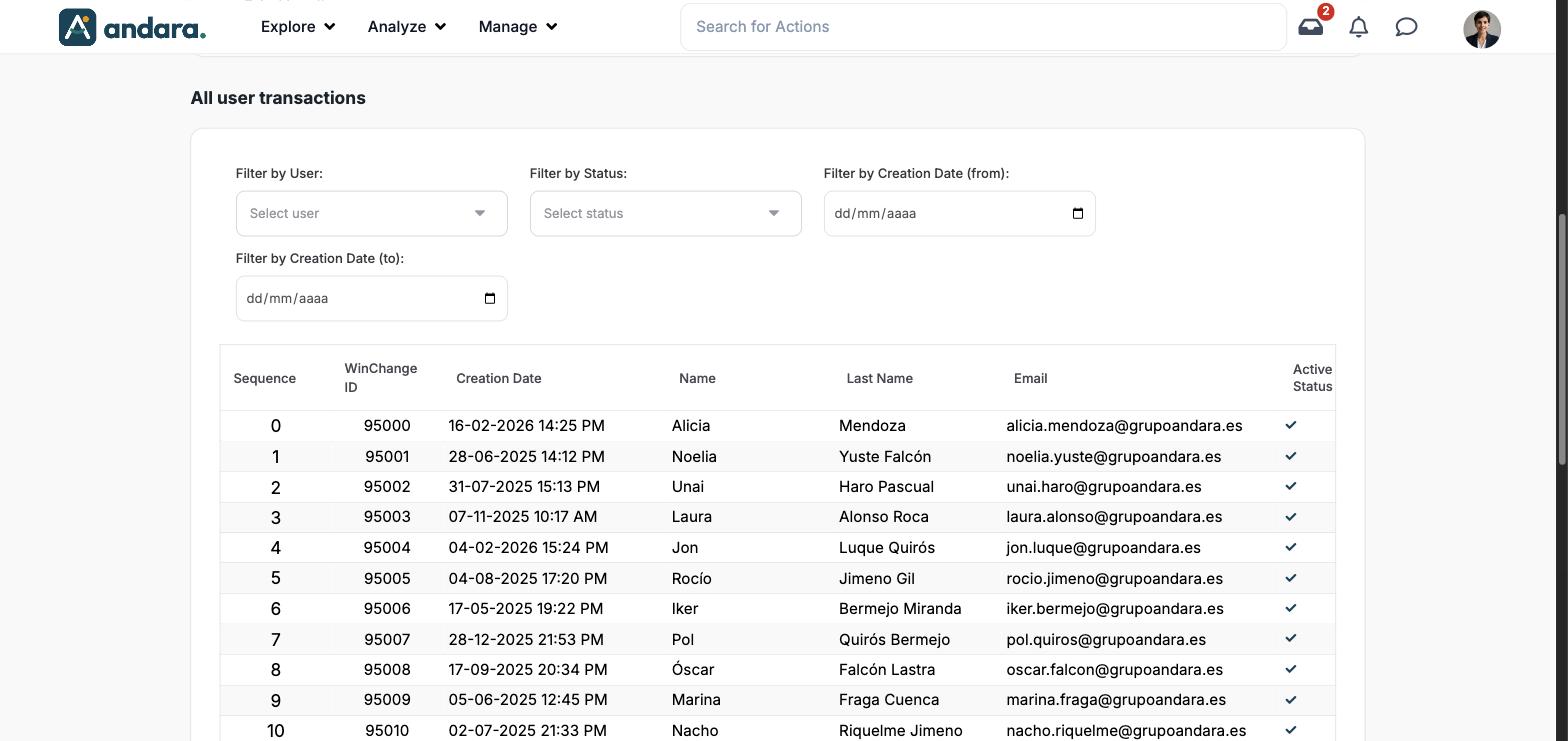
Here you have the list of people in the project: their WinChange number, when they signed up, their name, their email and whether they are active. Use it to know who is in and since when, and to export the list to a spreadsheet.
Where it is: Analyze › Users Detail Report.
What you see#
| Element | What it shows |
|---|---|
| General filters | Filter by Organisation and Filter by Location (see Filters). |
| Generate Report | Loads the table with the general filters you chose. |
| Download | Downloads the table as a spreadsheet file. |
| All user transactions | The table of people, with its own filters on top. |
| Sequence | Row number, starting at 0. |
| WinChange ID | The person's internal number. |
| Creation Date | When the account was created, with date and time. |
| Name, Last Name, Email | The person's details. |
| Active Status | ✓ if the person is active. |
| Pagination | Page numbers under the table. |
Metrics#
There are no summary figures: the screen is the list.
| Metric | What it measures | How it is calculated |
|---|---|---|
| Table rows | The people in the project who match the filters. | One row per person. |
| Active Status | Whether the person can sign in to the app. | ✓ active. |
Filters#
| Filter | What it does | Values |
|---|---|---|
| Filter by Organisation | Keeps the people in one unit of the structure. It takes effect with Generate Report. | Drop-down with the organisations. |
| Filter by Location | Keeps the people in one workplace. It takes effect with Generate Report. | Drop-down with the locations. |
| Filter by User | Finds one person in the table. | Drop-down with the people. |
| Filter by Status | Keeps active or inactive people. | Active, Inactive. |
| Filter by Creation Date (from) / (to) | Keeps the sign-ups in a period. | Dates (dd/mm/yyyy). |
How to#
See who signed up in a period#
- 1
Load the table
Pick an organisation or location if needed and click Generate Report.
- 2
Set the dates
Fill in Filter by Creation Date (from) and (to).
- 3
Take it with you
Click Download.
Things to know#
- Despite its title, the table does not list transactions: it is one row per person, with their sign-up.
- The creation time mixes 24-hour format with AM/PM (for example "14:25 PM"). The 24-hour time is the right one.
- To change someone's details or deactivate them, go to Users: this screen is read-only.
Related#
- Users and Pre-Users.
- Users and access.
- Login Dashboard: who signs in and when.